Thursday, February 24, 2022

Driving By FB Live 2.24.22

 Today's Facebook Live featured the Sale-A-Bration stampset Driving By. This stamp set will only be available for 4 more days  by placing a $50 order then selecting this set from the Sale-A-Bration brochure (item # 158099). Place your order on this link which will take you to my personal store.

Here is the card I demonstrated on Facebook Live and on YouTube.


 Then here are a few other cards also made with the Driving By stamp set.


Back to the first card. It is done with a layout that can be used with so many other Designer Series Papers and stamps. So here are the supplies with their sizes that you need to do that card.

You've Got Style card

Basic White Cardstock  5 1/2" x 8 1/2", scored at 4 1/4"; 3 3/4" x 5"; a scrap
Designer Series Paper   2" x 5"
Colored Cardstock to coordinate with DSP    4" x 5 1/4"; 1/2" x 5 1/4";   

You'll also need sentiment stamp and any other embellishments you choose to use.

Watch the video (see links to FB or YouTube above) to see how to make the card!

Here are a couple of other cards using that design:


So now go create with your supplies! Thank you for looking and please click FOLLOW to the left. That helps me a lot!! If you have any questions, leave a comment and I'll get back to you.


Sunday, February 20, 2022

BEYOND THE HORIZON Paper Pumpkin Kit

I'm so excited about this kit because it coordinates with the beautiful On the Horizon bundle - one of my favorites!

So we need to have a PARTY!

Saturday, March 26 1 p.m. - 4 p.m.

Order your kit here by March 10, then bring it with you on the 26th. We'll work on them together PLUS you'll get 2 kits for alternative cards using your products!

Make sure you use the link above so that I get credit for your order! Thanks and I'm looking forward to getting together! Let me know that you're coming!

Wednesday, February 16, 2022


IT'S ALMOST MYSTERY THURSDAY so gather your supplies and join me Thursday morning at 10 a.m. CT here to put together this cute funfold card.  Or watch for me to put the YouTube video link here after the Facebook Live is over. 


CLUE #1 (Gather these supplies and have them cut and ready for Thursday morning)

*Choose a Designer Series Paper (DSP) that has some patterns that are light enough to stamp words on. Cut                     two pieces     4” x 5 ¼”, 2” x 3/4” 

*Choose a second DSP in coordinating design – Diecut with 3”x 4”(ish) scalloped rectangle from                    Stitched So Sweetly or another rectangle approx. this size (or can be cut to 3” x 4 1/8”)

*Choose 3 colors of cardstock that coordinate with chosen DSP.

                Cardstock #1    5 ½” x 8 ½”, score across short end (or parallel to short end) at 2 1/8” and 4 ¼”

                Cardstock #2    3 ¼” x 4 3/8”

                Cardstock #3    Scrap for image to be fussy cut or diecut. No bigger that 3”x4”

*24 inches of ¼” or smaller ribbon that coordinates with rest.

 You will also need the following:

*Ink that coordinates with and will show up on DSP.

*Sentiment for outside and inside of card. Outside needs to fit a 2”x 3/4” piece of paper.

*Stamp image that is 3”x 4” or smaller – have this already die cut or fussy cut

*Stamp image that is small and can be used as background filler

*Detailed Trio Punch or a ¼” hole punch will work

*Embellishment  

*Adhesive and Stampin Dimensionals


Thursday, February 10, 2022

Funfold Booklmark

My Facebook Live today featured a 'funfold' that is NOT a card...but a bookmark. I borrowed this from the past and decided to resurrect it! It's an easy project and makes a fun little gift.


Our project begins with a 6 x 6 sheet of Designer Series Paper (2-sided). For this post, I chose the retired Dandy Garden but on my Facebook Live, I used current Designer Series Papers. 

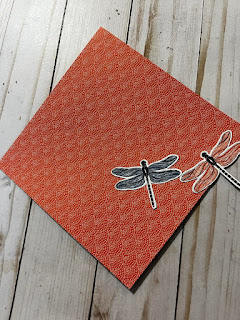
From the Dandy Garden paper, I punched out a couple of the dragon flies. I also used the Stitched Shapes dies to cute a Basic White circle.

Decide which side of the paper that you want to be prominent. I wanted the orange side of this paper to be at the top so that is the side that will be on the outside of your first fold, which is to fold the 6x6 piece of paper in half.


 Next you will fold one corner back up to touch the top and burnish all edges.


Next you will use your bone folder to score along both edges of the piece folded up. This will make the next step easier.

Now you will fold each orange triangle down to the bottom corner.


And now for the last fold! 

Take each of the two free points and tuck them into the underneath pocket.


Now it's time to embellish!  And you are ready to slip this over the corner of the page of your book to be assured your place will not be lost!


Here is the link for the YouTube video which will show you exactly how to make this! Hope you enjoy it. Please comment or give me a smiley face or a thumbs up if you do. Also, click the Follow link on my blog to receive notifications for each new post. Thank you for your support!


Friday, February 4, 2022

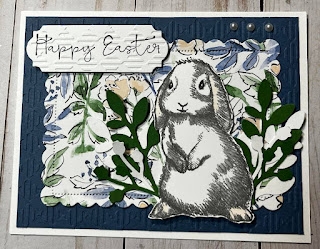
Easter Friends February Class To Go


This stamp set can be yours with the February Class To Go, along with 1/2 package Hand Penned Designer Series Paper, 3 card kits using the stamp set, complete PDF tutorial with color photos. All for 

$35!

If you want to include the ADD-ONs, you can get

    Boughs Punch  $18 (catalog price) and Gingham Embossing Folder $7.50 (catalog price)

So for an additional $25.50 you will get these two add-on items and I will pay the shipping and tax.

So for $60.50 you will get the Easter Friends stamp set, 1/2 package Hand Penned Designer Series Paper, 3 card kits using the tools, complete PDF tutorial with color photos, the Bough Punch and the Gingham Embossing Folder!

You can pick up yourself or pay an additional $8.50 for Priority Mail to you.

DEADLINE TO RSVP IS FEB 10 so don't wait!! Just e-mail me at suzyzoo@verizon.net and

I will get back to you for more info.

And here's the cute cards which  will be included in the card kits...

or this one (haven't decided yet!)


Wednesday, February 2, 2022

My Dilemma

I have a dilemma and I need your help! I can't decide which of these two cards I should use for the February Monthly Class to Go. I'm using the Easter Friends stamp set. I made the card with the round die from Picture This die set first. Then I decided to see what I could do with the rectangle die from the same set. Now I can't decide which to include as one of the three card kits! I can't do both because the other two cards are already set to go. And I tried to do something different with each card. So which of these two cards do you like the best?


Please help me out and comment below. I'd also love it if you would 'Follow' my blog! Thanks!!